Tuesday, August 7, 2012

Just killing time...

Well, good news.  Matt and his dad's A/C repair business has been steadily busy since their first job.  Bad news, Matt has been gone most days and nights for the past week.  I feel like I haven't had any real time with him in far too long.  I am currently waiting to hear from him about his job to see if he'll be home before I go to bed. Anyway, while I'm waiting for him to come home, I've been searching for cool clocks.  Here's what I've discovered so far.


I love the different size and colored frames with different patterned paper in each.  This one seems to have endless possibilities.  Found at decor8. A good thing about this clock is the size.  It could be made to be as big as I want.  I'm thinking of putting a clock above where our television is in the living room.


The nature loving girl in me has a strong pull towards this bark encircled wood clock.  It is actually a DIY on design sponge.  Seems really easy but I don't know that it would be quite big enough for the space.


I also found this etsy shop, ObjectifyHomeware, that has some really creative patterns on their clocks.  It made me realize, that with a wood circle, I could really make a clock look however I want.

Another wood circle clock with a pattern.


A cool striped wood clock.  Stripes could be done to complement the room.


I like the idea of this one.  A square piece of wood is much easier to cut than a circle, but it could still have a unique "shape".  This is a definite possibility.

One more etsy shop that I really love the work of is uncommon.


I love the color of the outside of the clock.  I love the fact the center part is wood or some kind of particle board, and the numbers are engraved.  I like the slightly industrial look of the screws and the pop of red on the second hand.  This clock was designed really well.  It's just not quite the right size.


And what's not to love about this scalloped, pale blue clock with fancy hands and a red second hand.  Plus the carved numbers... if I lived near the person who makes these, I'd want to be friends with them.

Anyway, that's the end of my clock shopping.  I'll have to check out my DIY options at Hobby Lobby and Lowes to see what I can create myself.

Tuesday, July 31, 2012

Mirror turned Chalkboard


This month I am hosting a bunco group at my house so I am finally motivated to get some decorating done.  The entry room is in need of some help.  I have a key holder by the front door, but decided I wanted something to hang above it.  I found this mirror I'd bought 2 years ago from Hobby Lobby in the garage and decided it would be my first project.


First I cut a piece of computer paper to the size of the mirror so as to not get spray paint on it. 


Next I took it outside, laid it on some newspaper, then used the blue spray paint I used on our outside lights and flower pots.  I figured the blue would complement the green entry.


Second layer of spray paint.


Third and final layer of spray paint.  Painting things in thin layers will keep it from having drips or splotches.


Here is the mirror with it's finished paint.


Next I used an old newspaper to cut a very precise template for the chalkboard contact paper I bought. 


I was a bit unsure about chalkboard vinyl surface but it seems to work really well.  I also plan to use it to make labels for all of our clear containers... flour, sugar, and what not.


Here's the paper, cut to size.  It took me a while to put it on, but the good news is I was able to keep peeling it up and nothing bad happened.  It seems to be pretty resilient.


Chalkboard in place.   The End.

Wednesday, July 4, 2012

Kitchen, Before and After


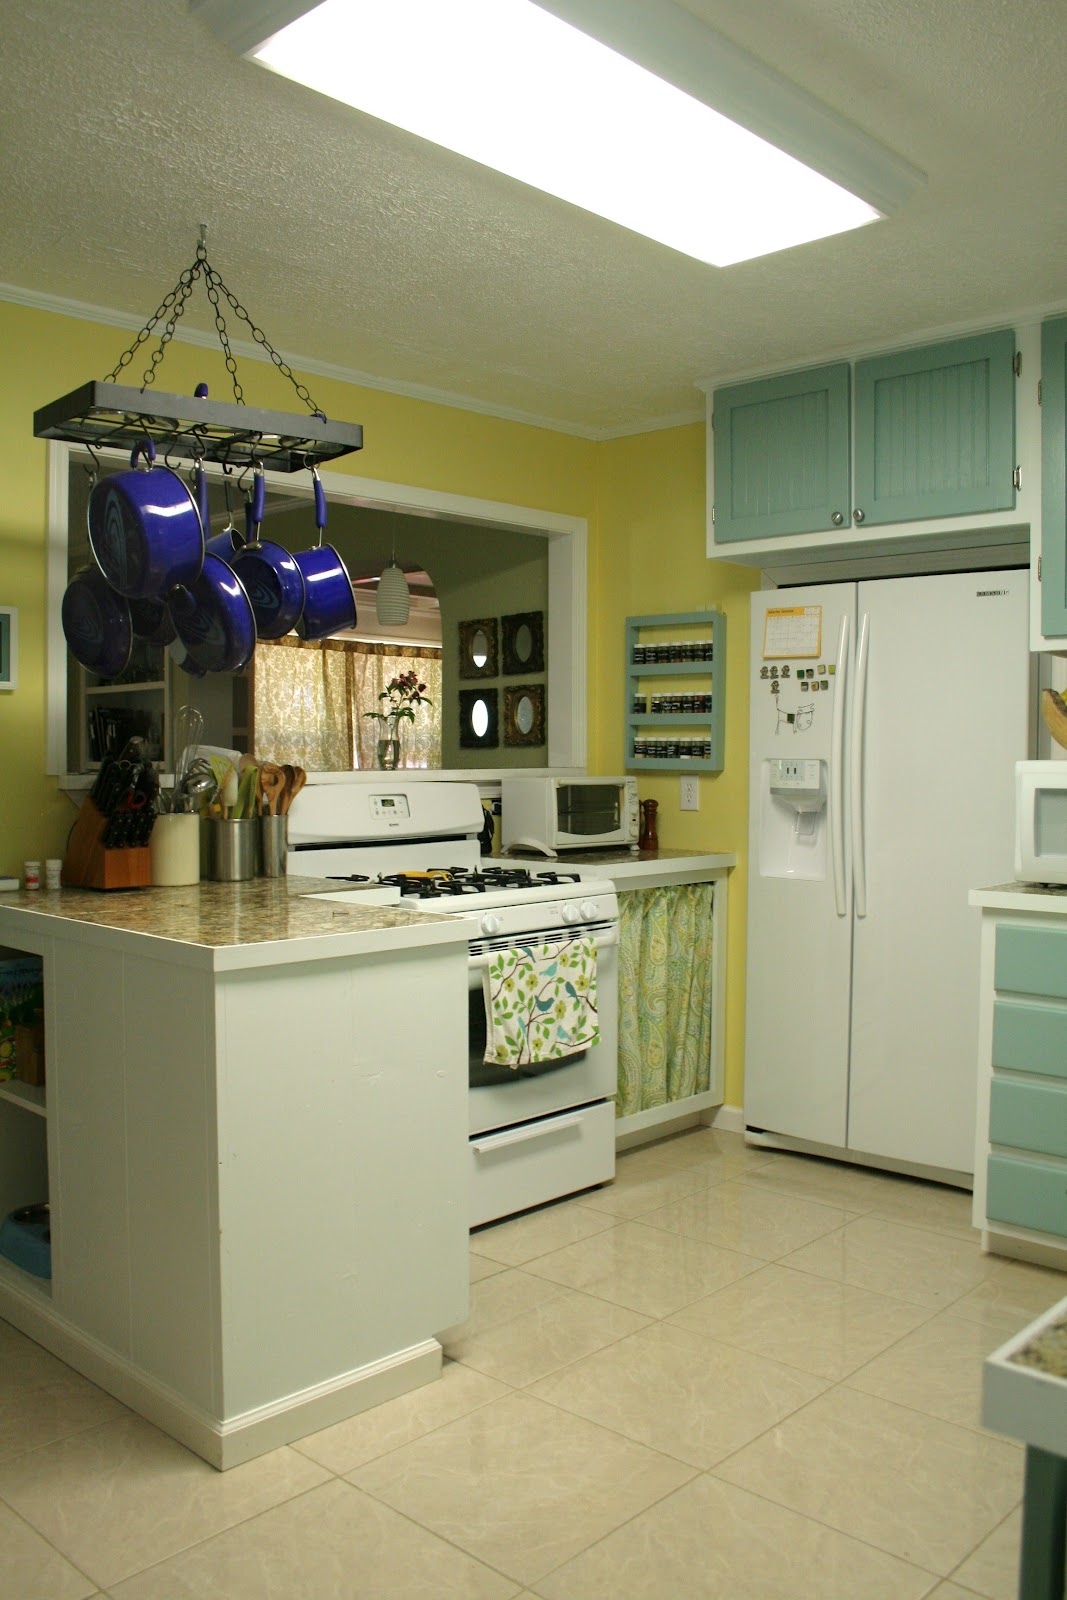
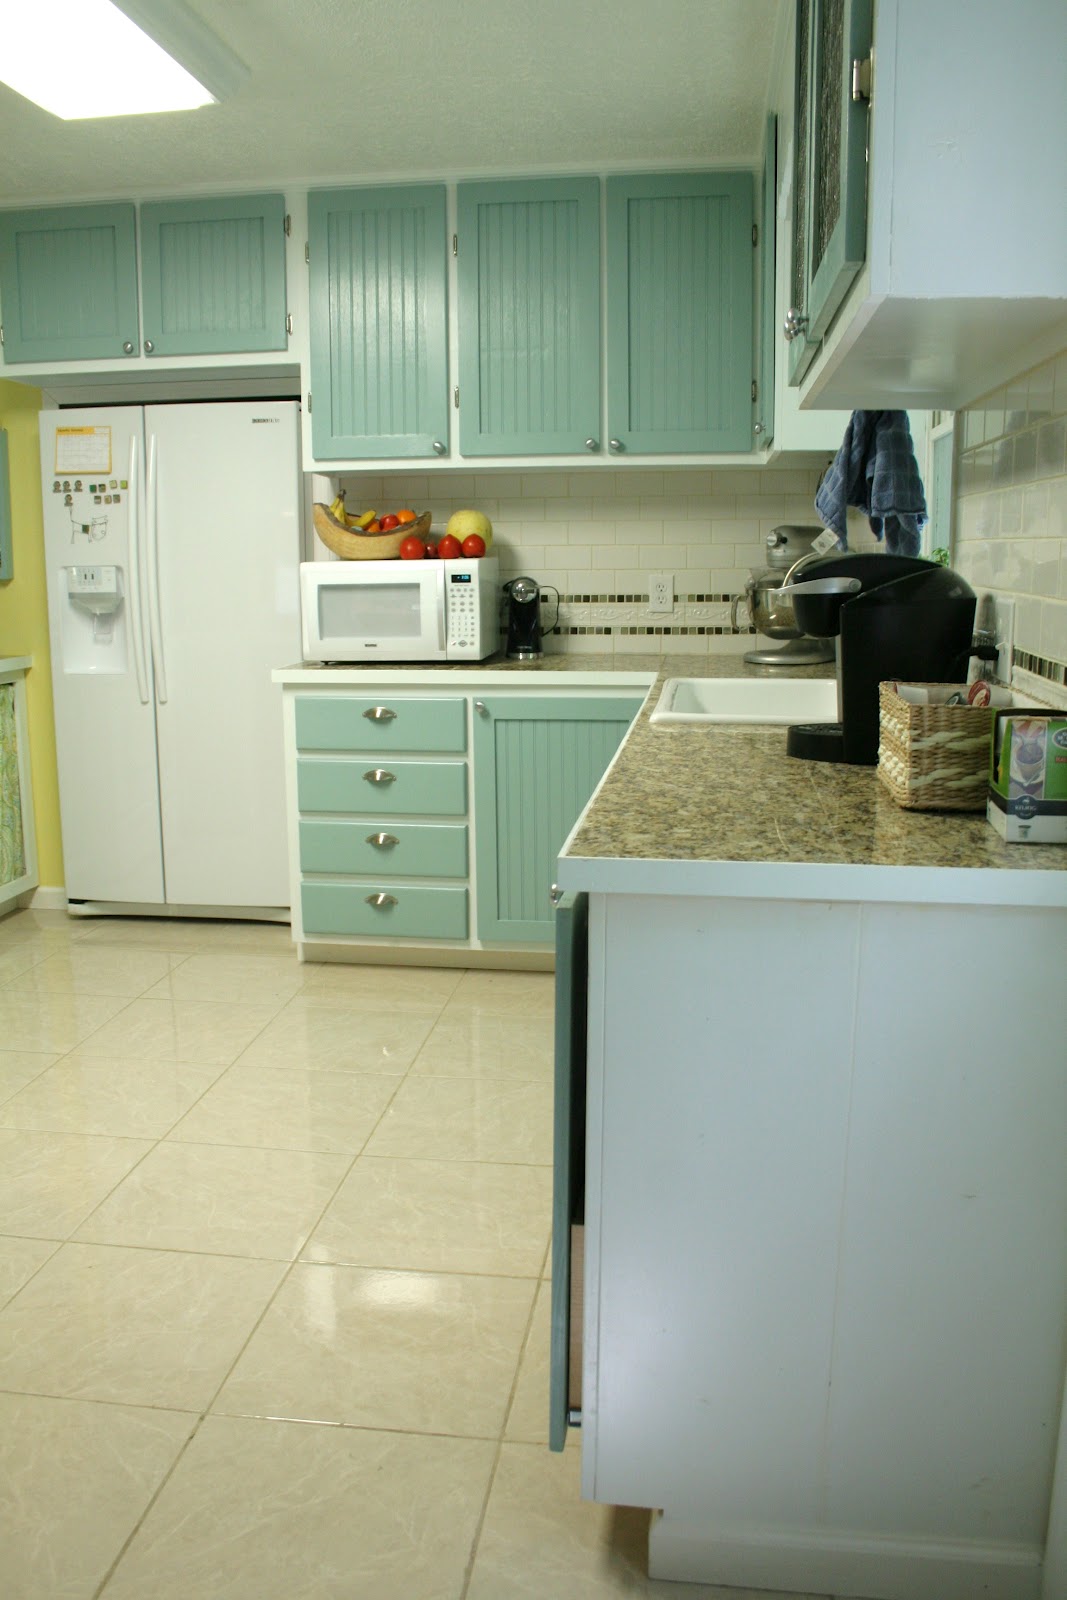
It has been more than two years since Matt and I started our home renovation.  We basically camped out in two rooms for months using a hot plate and a microwave to prepare food.  With the exception of our hardwood floors, and the kitchen cabinets his cousin built, we have built this house with our own hands.  It has been a giant labor of love.  This summer I only work 2 days a week at the Montessori school so I am making it my goal to finish and clean this house... one room at a time.  The first room I completed was the kitchen.  Here are the before and afters with some added pictures of the details.  Enjoy!


We picked the blue of the cabinets to match our dishes.  I know its not for everyone but I love the feel it gives.


We wanted granite counter tops but after pricing out the slabs we knew it was out of our budget.  Matt's sister has a tiled granite counter and I've always thought it was lovely so we decided to do the same.


The backsplash adds a lot to our kitchen.  I put up the tile, Matt cut any pieces that needed cutting, then I grouted it.  It was one of the projects that once I started it, I wasn't sure it would ever get finished. 


We really wanted to open up the kitchen to the entry/dining room more than it was.  There was a small square cut out of the wall above the stove when we bought the house and we just decided to expand on that idea.  We made a pass through with a granite tiled shelf.  We also opened up where there was a regular sized door and made a large opening.


The original door into the kitchen.


Same spot with the opening much wider and cabinets built out to meet it on the left.  You can also see in this picture where we put in a small shelf for cookbooks and Buck's food bowl.


The pantry on the left was made deeper, and cabinets were built off this wall.  That tiny door on the right seemed so strange.  On the other side of that wall is the guest bathroom.


My mom had said before that if she ever redid her kitchen she would want a desk in it.  I took her advice and added this one on the cabinet wall.  We have really used it a lot since building it.


I searched for a pot rack for our apartment when we lived in it 3 years ago.  They were all very much out of my budget.  Then at a flea market I came across this black one for $7.  I had to have it.  I went and bought black shower curtain hooks that have worked great as the pot rack hooks.


I found this door knob set at TJ Maxx a while ago and bought it before I ever had a place for them.  They could actually be functional if they were on both sides of a door, but I decided to use them on the front of our kitchen closet instead.


I love love love love our giant sink.  It is one of my favorite things about the kitchen.  I can set multiple pots flat in the sink with water soaking in them.  I always hated how sinks were never big enough to do the jobs for which they are intended.  I also love our tall faucet.  It's nothing fancy but I really like how functional it's been.


These are succulents I planted in little coffee mugs.  I have several serving pieces of Peter's Pottery so my big sister and I traded, some of my mismatched red leaf pottery for her Peter's mugs.  They look great with the colors of my kitchen.


I wanted to have glass front cabinets so Matt's cousin Isaac built these door frames for me to get glass cut and put into them.  Then the other day when we were working on finishing the kitchen, we happened to have a giant roll of chicken wire at our house, since we soon hope to have a chicken coop, and Matt and I decided we'd like to try the doors with chicken wire.  We really like the country look of it.


Sunday, June 24, 2012

The search for cloth napkins


I need to get a dozen cloth napkins, but they seem to be so pricey.  My dishes are white and robin's egg blue.  I thought a nice white or linen color would look good and be easy to bleach and clean.  I've also considered navy, chartruese, or brown.  These are from Walmart and run $8 for 4, which means they obviously aren't the greatest quality.


These are from Pier 1 Imports and really beautiful.  They are $4.95 a piece which on my budget would really add up.


Home Goods Ala Carte on etsy has these lovely napkins.  $4 each ($16 for 4).