Wednesday, April 25, 2012

How-To: Book Sleeves

Almost our entire bookcase has books that are covered in brown paper or brown paper with a white floral pattern all over it.  I find that it makes the bookcase still a focal point, but much less chaotic.  My husband would say otherwise.  Here is how I cover them.


I am currently working on covering the Lemony Snicket: A Series of Unfortunate Events books.


First I take the roll of paper, unroll it a little and fold the bottom edge up about 1 to 2 inches.  I then lay the book I'm covering on the paper to measure how much to cut off of the top.


Once I have cut the roll off, I fold down the top part to the size of the book, or just a smidge bigger.  It doesn't need to have too big of a space around the edge because the book will sit at the bottom and the extra on the top looks odd to me.


I then fold the side over, a little wider than an inch.


I roll tape and put it on the side flap.  I usually do four pieces per flap but there are the occasions that it requires 3 top and 3 bottom.


I then place the back cover in the pocket I just made by taping the flap.


Next I flip the book over, cut the paper to form another flap, and mark where the book ends.  That's how I know I'm making a snug fit, but not too small.


After the flap is folded, you place tape on the folded parts, fold it back together, and put in the front cover.


I then use a black pen to write the title of the book and the author's last name.  Open the book before you start writing so you know it's facing the right way.  If you write it upside down, you could just take the book out of the cover and turn it the other direction.
.
.
I had intended on having the series covered before I posted so I may update later and show the covered stack of books.

Monday, April 23, 2012

Happy birthday Matty!!

My darling husband's birthday was this weekend.  We had a laid back birthday: went to church, ate barbecue plates we bought as a fundraiser, went to walmart to get his grill, made him a cake, and had a lovely dinner.


I bought a bag of plastic frogs to be the candle holders.  I drilled 28 holes into the 8 frogs.  I intended to paint them but never did.


Here they are on the triple layered chocolate cake with chocolate icing.


Matt was super excited about his grill.  It is charcoal on the left, gas on the right, and even has a gas eye on the far right for frying food.  I'm excited about all the fresh turkey, fish, and deer he'll be cooking on it.


Matt made deer burger sliders, grilled carrots, and stir-fried kale, bok choy, and onion.


It was delicious. 


We had cake and ice cream.  I was pretty pleased with how the cake turned out.


Happy Birthday again to my sweet husband!  I'm so grateful to have you in my life, and look forward to all the birthdays and milestones we will celebrate together.

Friday, April 20, 2012

Outdoor Design

Matt and I are starting to think about the exterior of our house.  We have been working two years, solely on the inside, and the outside is in dire need of attention.  The first priority is to get a single car garage door put on, then to put up siding on the half of our house that has faux-wood-composite-rubbish.  I never post pictures of the outside of our house to Facebook because I find it embarrasing.  But that will soon be changing.  I like to find inspiration in pictures and shopping.  These pillows seem like really fun jumping off points.


Monday, April 16, 2012

Just monkeying around

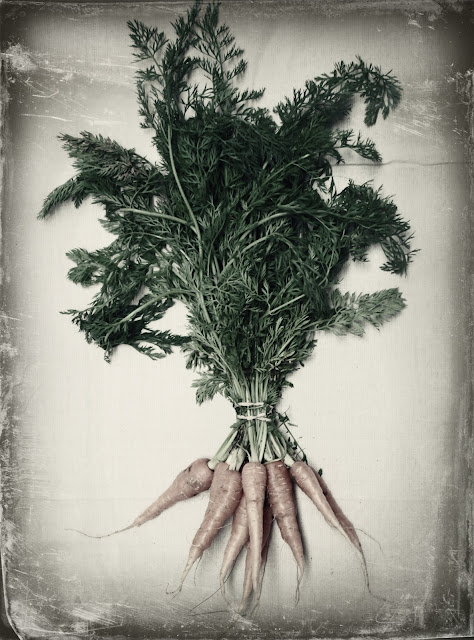
I was catching up on some blog reading when I saw on How About Orange that there is a new website called PicMonkey where you can edit your photos for free.  I decided to play around with it for a few minutes.  I started with a photo I'd taken of some carrots from Native Son Farm, I'd mentioned here, that I am using to paint from.  I had fun trying several different effects.  I think I might become a big fan of PicMonkey.


Original image


 A few subtle effects.


 Added a couple more effects and some text.


Overly dramatic carrots, but I still think they're lovely.

Tuesday, April 10, 2012

Tishomingo State Park


Easter weekend my husband, our dog, and I went camping at Tishomingo State Park.  It's only a tad over 30 minutes from our house but feels like you've gone somewhere far off.  The weekend before Easter I went scouting for a good tent that was also affordable.  I tried Wal-mart, Target, and finally found one at Dick's Sporting Goods.  The tent I bought was on sale from $199 down to $60 and made by a respectable company.  Matt and I did a test run putting it up in our entry room and it took up the whole space.  The picture below doesn't do it justice.  It's about 9'x11' and tall enough in the middle to stand.


Friday we went for a hike over the swinging bridge and up the hillsides for a few hours with Buck.  It was very beautiful and the weather was perfect.


There were waterfalls all over the place.  I think we saw close to ten if you include all the small ones.  


This tree had an impressive root system that ran all down the side of the hill.


 This is our sweet dog Buck, waiting with me in the truck for Matt.


Matt is an expert fire builder, and outdoorsman, and photographer.  He took this picture of the fire.  Friday night we enjoyed toasting marshmallows and sitting by the fire.  I happened to eat a few to many mallows and ended up feeling sick all night.  Lesson learned... maybe.


I loved these mossy stone stairs.  They almost looked like they were put there by God.


I like these two pictures of Buck.  He was sitting on the center console and I called his name.  The camera distorted the size of his head.  Kind of looks like a bobble-head doll.


We had a lot of fun camping, and hope to go back soon.